Having Amenities set up is not critical to the operation of Tourplan – it will function without them. Supplier and Product set up can continue without them; they can be added at a later stage if required.
(continued from Internet Details)
Before amenities can be attached to a supplier, they must first have been defined in CodeMaint. Detail on setting up Amenities is in the System Setup Training Guide.
|
|
Having Amenities set up is not critical to the operation of Tourplan – it will function without them. Supplier and Product set up can continue without them; they can be added at a later stage if required. |
Attaching Amenities – Creditors
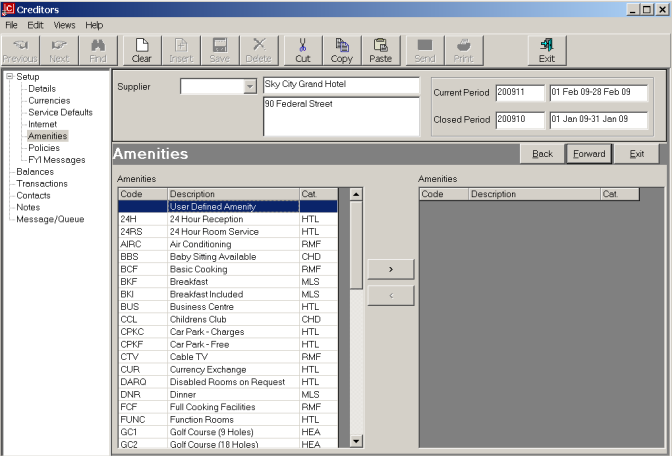
Attaching the Amenities at the Creditor Level is a simple process of select and move.
Screen Shot 15: Suppliers - Attach Amenities Screen

The list of all amenities loaded on the system will display.
To attach an amenity, highlight it and use the > arrow button to move it across to the right hand side of the screen which attaches it to the Supplier. To remove an amenity from a Supplier, highlight the entry to be removed in the ‘Amenities Attached’ list and click the < arrow button.
|
|
The Amenities Available List, on the left hand side, can be sorted by the three column headings, either by Code, Description or Category by double clicking on the heading. |
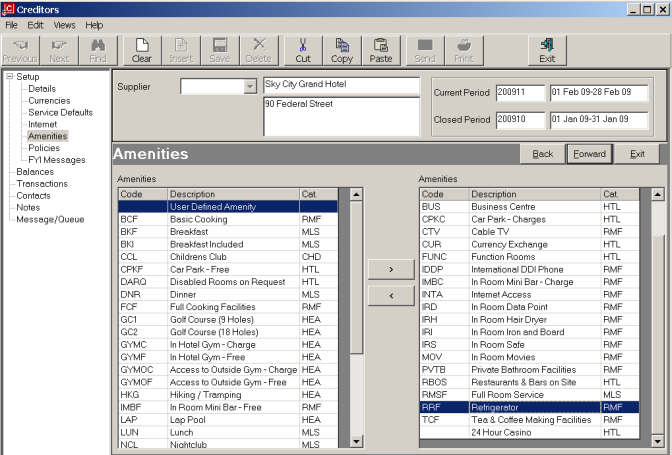
There is an entry at the very top of the ‘Amenities Available’ list called User Defined Amenity. This can be used to add a ‘One Off’ amenity if necessary. For example if there is an item of ‘24 Hour Casino’ and this affects only one supplier, then rather than adding this once only item via CodeMaint, it can be added as an extra to the Creditor and / or Option only.
To add additional Amenities that have not been included in the list, attach the User Defined Amenity and then type in the description required. Then select the Category from the drop down to the right of the description.
Screen Shot 16: Completed Supplier Amenities Screen below shows a completed Amenities Screen.
Screen Shot 16: Completed Supplier Amenities Screen

Forward
To continue setting up the supplier, click the ‘Forward’ button on the Wizard bar. This will display the Supplier Policies Screen.
Exit
To cancel setting up the creditor, click the ‘Exit’ button on the Wizard bar.
Back
If any item on previous screens needs correcting, use the ‘Back’ button on the Wizard bar.
(continued in Supplier Policies)